
To get started with Facebook Messaging using SMS-Magic, following are the steps you would need to complete after signing in to the customer portal. If you face any issues, you can contact care@screen-magic.com.
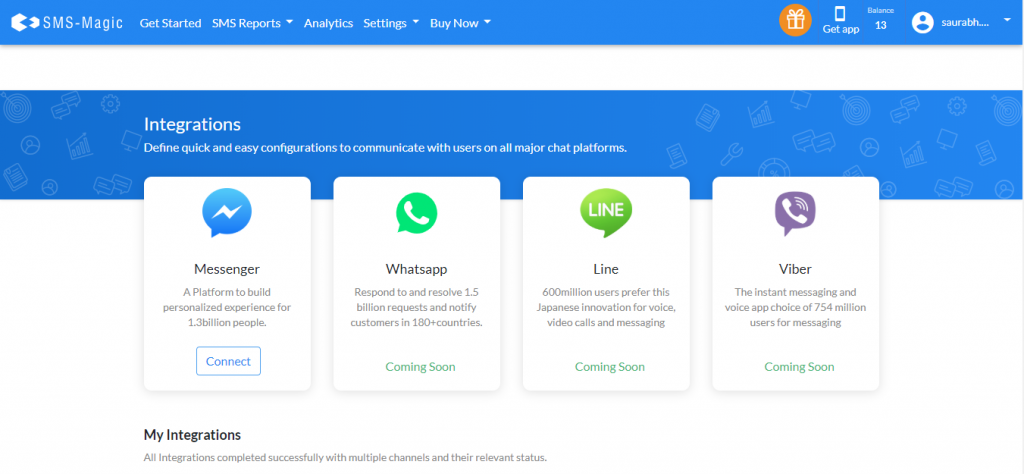
Click on the ‘Multi-Channel Settings’ under the ‘Settings’ tab. The integration page is displayed. If you are not able to find the Integration tab, please contact care@screen-magic.com.
Click on the ‘Connect’ on the Facebook Messenger tile which will display a ‘Create New Integration’ window as shown below:

Under the ‘Integration Name’ assign a name for the integration
Type a brief description
Click on the ‘Create’ button. The Messenger Integration page appears.
Click on the ‘Authenticate Account’ on the right to authenticate using your Facebook credentials
Log in to the Facebook account
Select the Facebook Pages for which you would like to enable permissions
If you have connected your Facebook account with SMS-Magic earlier, the system will automatically detect your selected Facebook Pages and permissions. You can change the Facebook Page selection by clicking on ‘Edit Settings’ as shown below:

Use the toggle to enable or disable the relevant permissions
Click on the ‘Done’ button
In the ‘Facebook Confirmation Page’ click on the ‘OK’ button
Once authentication is complete you are redirected to the Integration Page
Select the Facebook page from the drop-down list. The Page ID is displayed indicating the selected page.
Click on the ‘Connect Page’ button. The Facebook Page Integration is complete. This integration ID will act as senderID for sending messages over Facebook to subscribers of this page.
Notes:
Click on ‘Disconnect this Page’ and then click on ‘Disconnect’ from the drop-down list to delete the page connection.
Click on ‘Disconnect this Page’ and then click on ‘Delete Integration’ from the drop-down list to delete the existing integration.
Click on ‘Delete Configuration’ at the bottom of the page to delete the Facebook Page configuration and account authentication.
All customers sending a message for the first time to the Facebook page that you have integrated are added as subscribers.

