Now, with the Workspace, you can check all your existing connected Salesforce accounts and connect new accounts with ease.
Login to SMS-Magic application using your Salesforce Org credentials.
Once you’re logged in, you will be redirected to the Workspace page, from where you will be able to see the Production Account and all the Linked Sandbox accounts, and an option for adding new accounts.
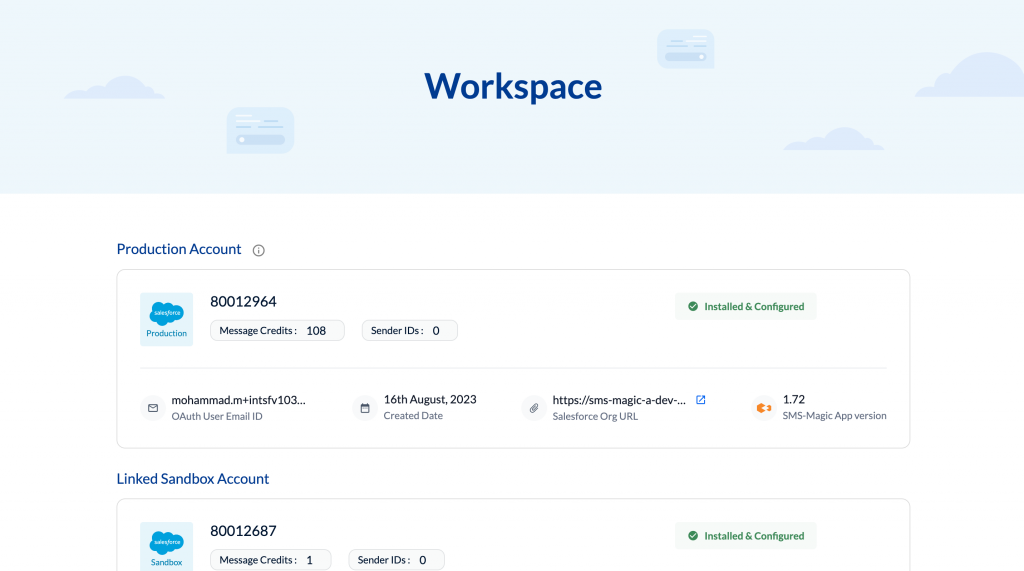
Click the Expand button to view detailed information about individual accounts. This will display Email ID, Created Date, URL, and Package Version.

You can install and configure the SMS-Magic Converse app for your Salesforce Org by clicking on the Install and Configure link.
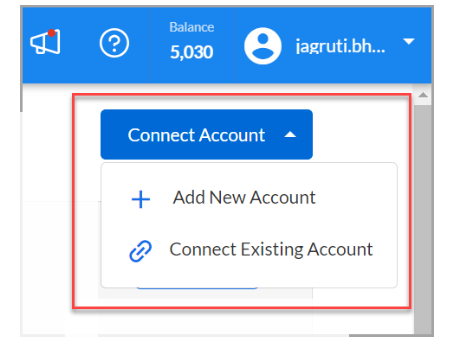
To connect a New Salesforce Account, click on the Connect Account drop-down menu.
The Connection Type drop-down menu offers two options:
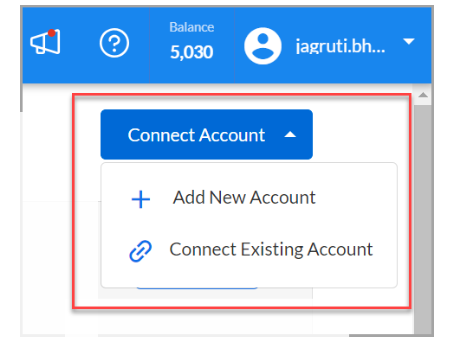
Add New Account: This allows you to install SMS-Magic Converse App in Sandbox environment.
Connect Existing Account: To connect an existing Salesforce Sandbox account, select this option.
NOTE: You can have one production account and multiple Sandbox accounts.
1. Creating a New Sandbox Account
Adding a new Salesforce Sandbox account to SMS-Magic Workspace is a straightforward process. This allows you to extend SMS-Magic functionality to a new account in Sandbox environment. Here’s a brief procedure for adding a new account in SMS-Magic Workspace:
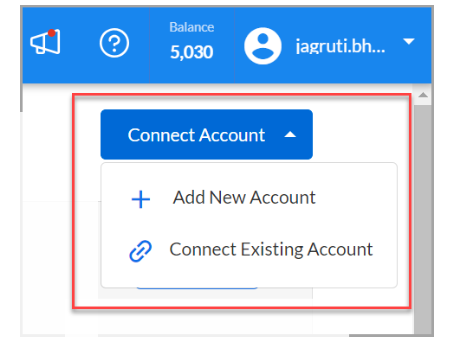
To add a New Salesforce Sandbox Account from the Workspace, locate and click on the Connect Account drop-down menu.
Choose Add New Account from the drop-down menu.
A dialog box will appear, presenting two options to select the environment:
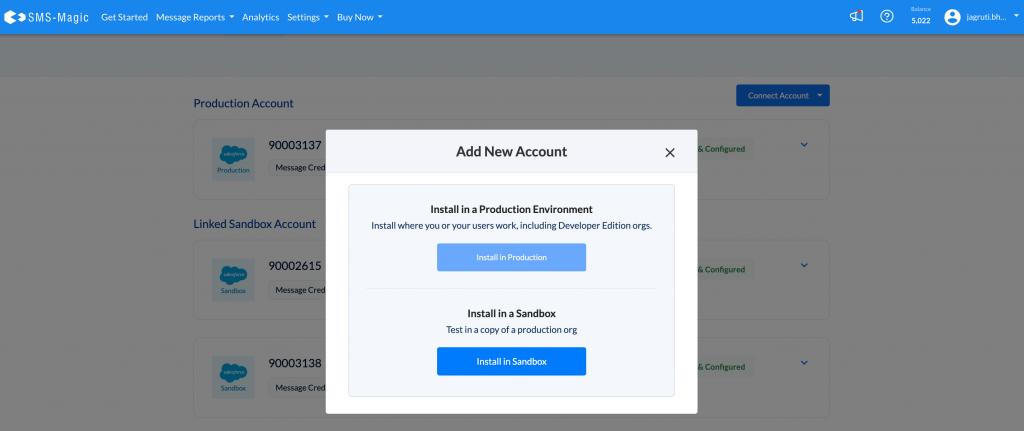
Install in Sandbox: Select this option to install the SMS-Magic Converse App in your Salesforce Sandbox environment. Sandboxes are used for testing and development purposes and allow you to experiment without affecting your live data.
After selecting your desired environment, follow the on-screen prompts to complete the installation of SMS-Magic for the new account.
You will receive a confirmation once the installation process is successful. Your new Salesforce Sandbox account is now connected to SMS-Magic Workspace.
You have successfully added a new Sandbox account to SMS-Magic Workspace. You can now manage SMS-Magic features for this account as needed.
NOTE: Ensure that you have the necessary permissions and access rights in your Salesforce Org to install the SMS-Magic Converse App for the chosen environment (Production or Sandbox).
2. Connect Existing Sandbox Account
Connecting an existing Salesforce Sandbox account to SMS-Magic Workspace is a straightforward process. This allows you to extend SMS-Magic functionality to an existing account in Sandbox environment. Here’s a brief procedure for connecting an existing account to SMS-Magic Workspace:
To connect an existing Salesforce Account from the Workspace, locate and click on the Connect Account drop-down menu.
Choose Connect Existing Account from the drop-down menu.
A Connect Existing Account dialog box will appear.
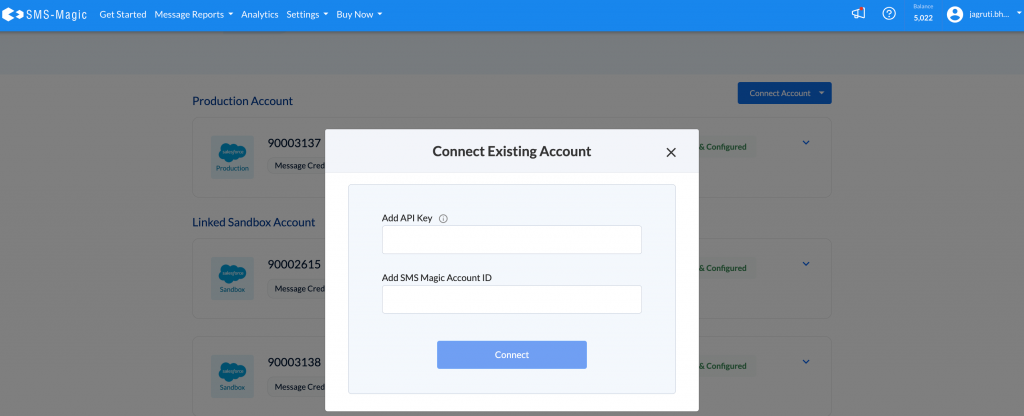
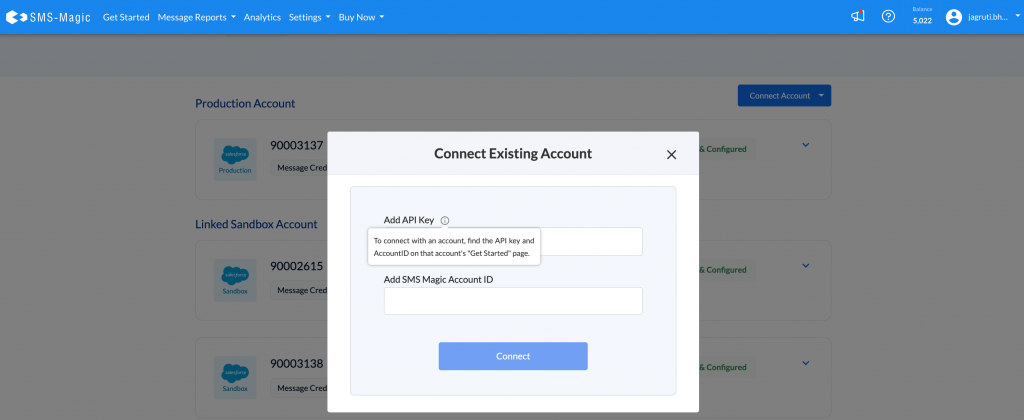

Enter the API key in the Add API Key field.
Enter the SMS-Magic account ID in the ‘Add SMS Magic Account ID’ field.
You need to enter the API key and account ID of the account that you want to connect. You get this information from the ‘Get Started’ section
After entering the required information, click on the ‘Connect’ button to establish the connection.
This concludes the process of connecting sandbox accounts in SMS-Magic Workspace. You can now seamlessly manage your Salesforce accounts, transfer Sender IDs, and control credit transfers as needed.

